
There is a particular kind of misery that belongs to long prints. You check at hour two and it is perfect. You go to bed. At seven in the morning there is a beautiful mountain range with a flat, scarred plateau where the summit should be, and eleven hours of filament wound round the extruder gear.
Map prints are unusually good at producing this feeling. They are long, they are mostly one enormous top surface where any flaw is permanently visible, and they fail late. A failed 40-minute bracket is annoying. A failed 14-hour terrain plate makes you want to sell the printer.
So this is about the two things that actually go wrong on long prints, how to tell them apart, and the one structural change that makes the whole problem smaller.
Why terrain is the hard case
It is worth being clear about why these prints stress a machine more than most:
- They are long. A 150 mm plate is six to ten hours. A tiled wall map is days. Every failure mode that needs time to develop gets time.
- The top surface is the object. On a bracket, the visible area is maybe a fifth of the print. On terrain it is essentially all of it, so a single under-extruded patch is not a blemish, it is the thing people will look at.
- The features are fine. Contour lines at 0.8 mm and building walls at 0.4 mm are exactly the width where a partial clog stops being invisible.
- Retractions are relentless. Contour lines and roads mean thousands of travel moves per layer, and every retraction pulls softened filament back up into the cold zone.
That last one matters more than people expect, and it leads directly to the main culprit.
Heat creep, and the tell that gives it away
A hot end is supposed to have a sharp boundary. Above the heat break the filament stays solid and stiff enough to push like a piston; below it the filament melts. The whole design depends on that boundary staying put.
Heat creep is that boundary migrating upward. Heat works its way past the break, filament begins softening where it should still be rigid, it swells against the walls, and the swollen section seals the path like a cork. The extruder keeps turning and grinds a flat onto the filament.
Here is the useful part. Heat creep has a signature, and the signature is timing.
| When it fails | Most likely |
|---|---|
| First layer, or within minutes | Nozzle height, bed adhesion, or debris already in the nozzle |
| 30–45 minutes in, or later | Heat creep. It takes that long for the heat to work its way up |
| Intermittent, with popping or spitting | Wet filament |
| Gradually worse over many prints | Carbonised residue building up inside the nozzle |
That "30–45 minutes" figure is the consensus across the printer manufacturers' own troubleshooting docs — Bambu's wiki and QIDI's clog guide both describe the same pattern. If your print dies at the start, stop looking at the hot end. If it dies in the small hours, you have found your culprit.
What to do about it
- Check the hot end fan first, every time. Not "is it spinning" — is it spinning at full speed and is the heatsink clear of dust? A fan at 70% is enough to cool the heatsink for twenty minutes and not enough for twenty hours. This is the single most common cause and the easiest to miss.
- Drop the temperature 5 °C. If you are printing PLA at 220 °C out of habit, try 210. Less heat to creep.
- Reduce retraction distance. Every retraction drags molten filament up toward the break. On a contour-heavy map with thousands of travels per layer, this compounds. Shorter retractions, and enable combing so the head crosses the model instead of retracting.
- Consider a bimetal heat break if you are chronically affected. It keeps the cold side genuinely colder than an all-metal break and is the one hardware change that addresses the cause rather than the symptom.
The other one: wet filament
Less dramatic, more insidious. PLA absorbs moisture from the air, and moisture in the melt zone flashes to steam. You get popping and hissing, rough extrusion, and a surface that looks slightly furry under a light.
On a small print you might not notice. On a terrain plate, where the entire visible object is one continuous top surface caught by raking light, you will notice every time.
The tell is audible. Stand next to the machine in a quiet room for thirty seconds. If it crackles, dry the filament — four to six hours at 45–55 °C for PLA. A spool that has sat open on a shelf through a humid summer is wet, whatever it looks like.
This is the cheapest reliability win available. A dry spool and a clean fan will prevent more failures than any slicer setting.
Maintenance, on a schedule you will actually keep
Everybody knows they should do this and nobody does it until something breaks. The intervals that come up consistently in the manufacturers' guides:
| Every | Do this |
|---|---|
| 20–50 print hours | A cold pull, to lift out carbonised residue before it becomes a partial clog |
| 50–100 hours | Cleaning filament — fed at 5–10 mm/s around 230–250 °C, then flush through with normal filament |
| Before anything over 10 hours | Brush the heatsink fins, confirm the fan runs up properly, check the spool feeds freely |
That last row is the one that matters here. Five minutes before a long print is worth vastly more than five minutes after it fails — and the check is genuinely quick.
The structural fix: stop printing for fourteen hours
Everything above reduces the chance of failure. This removes most of the consequence.
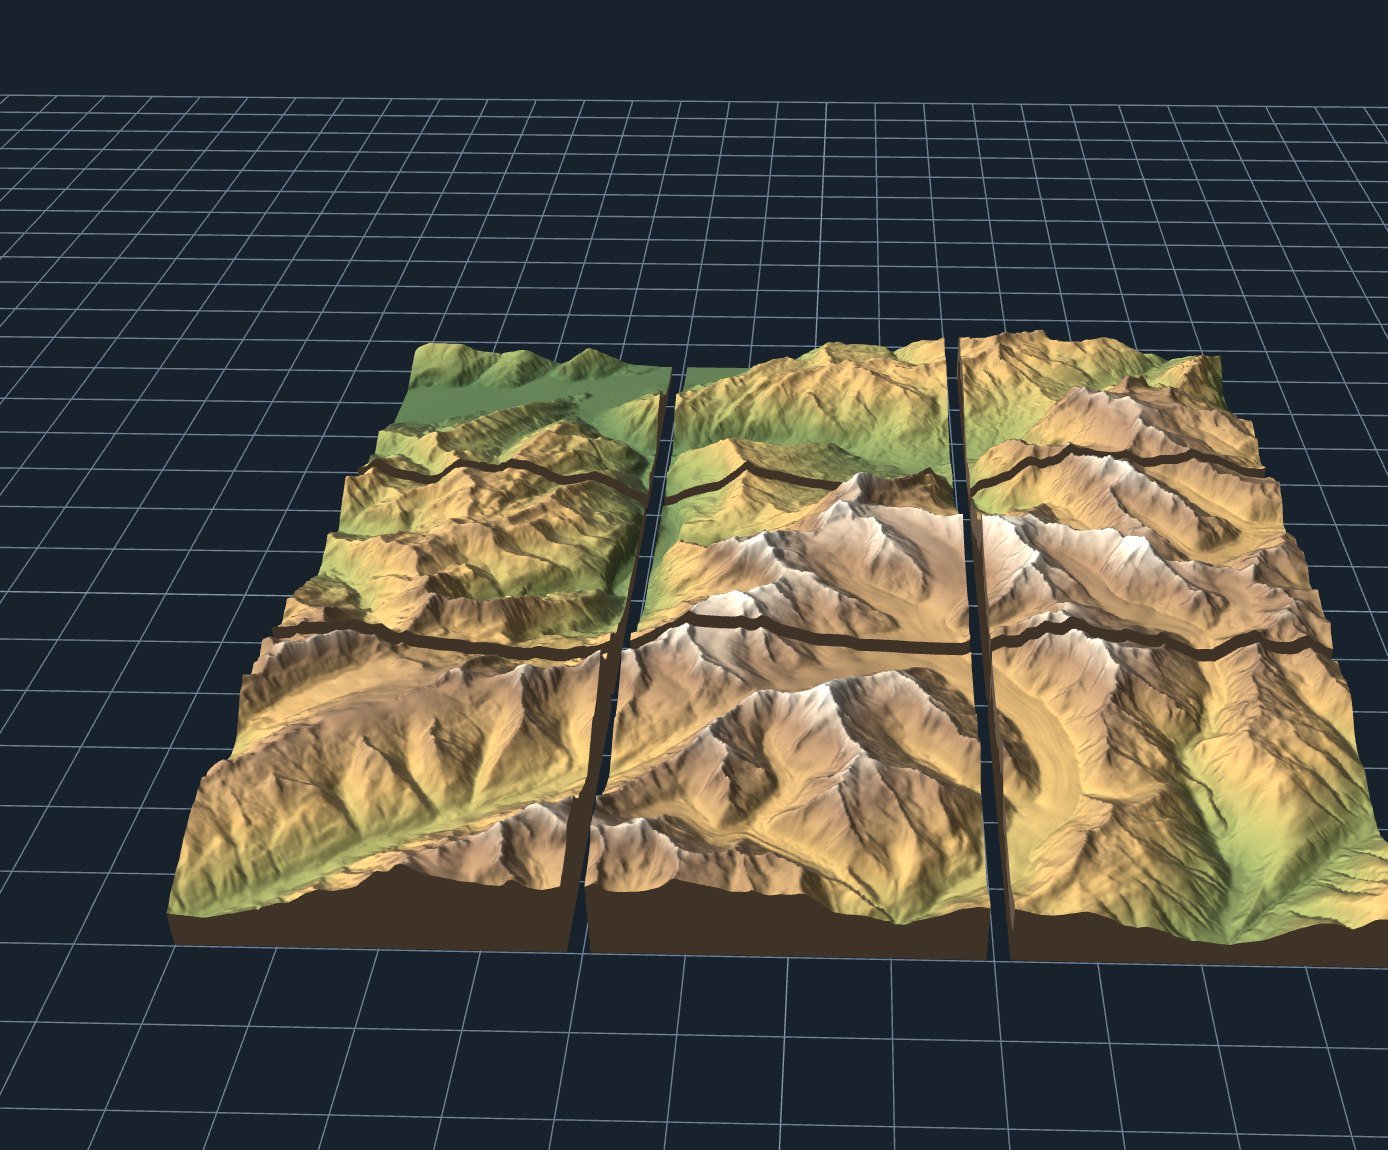
The arithmetic is not subtle. One 420 mm plate is a single print you cannot restart and cannot repair. The same map as nine tiles is nine short prints, each independently re-printable, and a failure costs you one ninth of the job.
There are quieter benefits too. You can check the first tile and adjust before committing to the rest. You can print across several evenings rather than leaving a machine running unattended overnight. And a tiled map with a raised frame round each piece genuinely looks better on a wall than one enormous plate.
I would go further: if a print is going to run more than about eight hours, ask whether it needs to. Not because long prints cannot work — they can, on a well-maintained machine — but because the downside is so lopsided. More on splitting sensibly here.
If it fails anyway
Do not immediately rip the filament out. Heat the hot end to printing temperature first, then retract by hand — cold filament in a hot break snaps and leaves you excavating. If it will not come, heat to about 240 °C, push a small amount through by hand to soften the plug, and pull firmly in one movement while it is still hot. That is a cold pull done in anger, and it works more often than it has any right to.
Then, before you restart: fan, filament dryness, retraction. In that order. It is nearly always the fan.
Sources worth reading
The manufacturers' own documentation is better than most of what is written about this, because they see the failures at scale: Bambu Lab on heat creep, QIDI's 2026 clogging guide, and Creality's unclogging walkthrough. They disagree on very little.